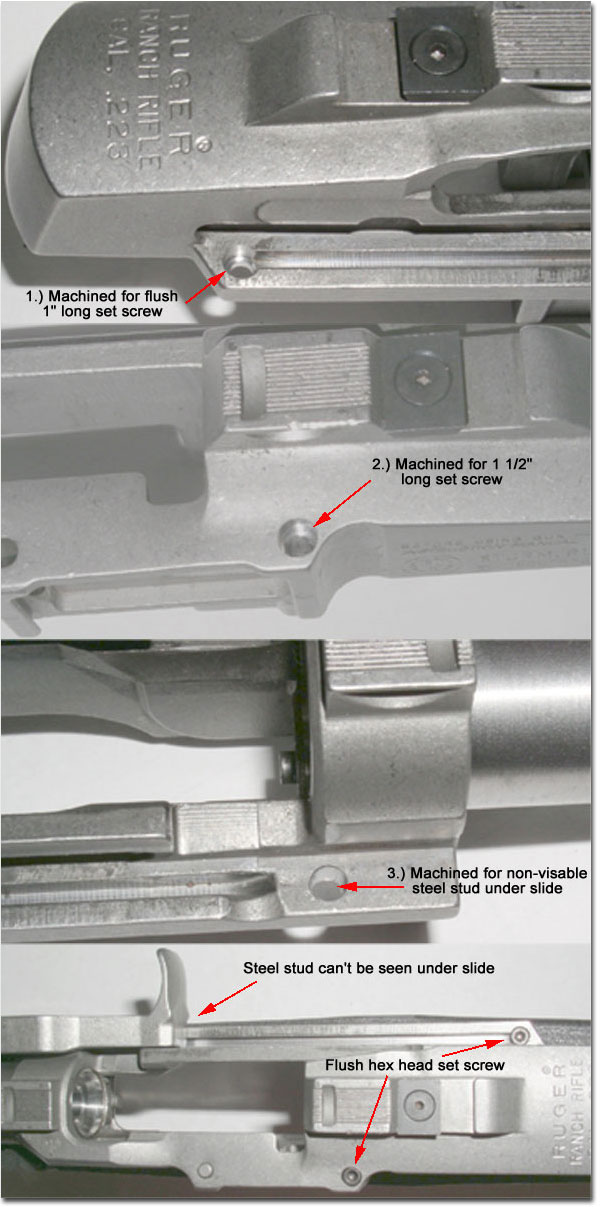
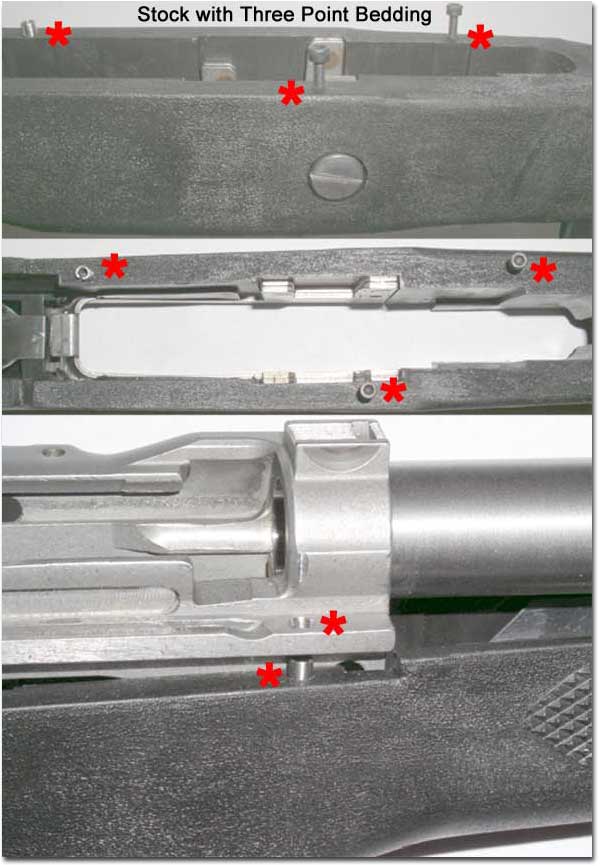
With your rifle pointed away from you, looking down at the top of the receiver you will notice the following: On the left side of the receiver there is a 4-40 hex head cap screw approximately 1” behind the bolt stop button. This screw goes through your receiver and about 1” into your steel bedding insert which is epoxies into your stock. See Illustration 2.) Then on the right side of the receiver at the very back of the slide track you will see another 4-40 hex head screw. This screw goes through the receiver slide track and into the steel bedding insert in the stock. See Illustration 1.) (Note: These screws must be removed when disassembling your rifle.) There is also a steel stud underneath the front right side of the receiver that is hidden by the slide. This must not be removed. It is a centering stud so the front of the receiver doesn't shift around. See Illustration 3.) Warning: When you reinstall the back two screws make SURE you do not over tighten them because they can break off in the stock! (If this happens we will charge you to replace the insert in the stock at a cost of $35.00 plus return S/H of $20.00) The correct amount of pressure to tighten is snug then 1⁄4 turn further and that’s it. DO NOT use any Loctite! If your screws are not staying in then degrease them and the steel inserts with alcohol then reinstall the screws.
Stock removal sequence
- First take the trigger group out by referring to the Ruger instruction manual.
- Then remove the shortest socket head screw from the right, back, left on the slide track. Illustration 1.)
- Then remove the longest hex head cap screw on the left side of the receiver Illustration 2.)
- When reinstalling use the reverse sequence. Long screw 1st, short screw 2nd and then the trigger group. In this way you are not fighting to get the longer screw to line up with the bedding insert.


